Blog with GitHub Pages
Hexo: generate static blog
Hexo is one of the most well known framework with npm technical stack.
The installation process is quit easy, especially with some package manager like HomeBrew on Mac or APT on Ubuntu. Then, just make a new folder and initialize it for the root path of hexo blog.
The folder after initialization should looks like:
1 | . |
There are basically 2 files we should cares about:
sourcefolder, which includes the future posts and other webpages (in markdown)_config.yml, which contains basic setup for the blog
The commonly used commands of hexo are pretty simple:hexo new [layout] <title>: layout is the template file inscaffoldsfolder.hexo generate: generate static web page from markdownhexo server: preview the generated file in local server, which is usuallyhttp://localhost:4000/
Another Important thing is Hexo’s Theme, most of them is a folder which should be copy tothemesfolder as installation. Some complicated theme is a complete hexo project, whose installation is basically copying your posts to their project. I am using NexTwhich is maintained by community.
#TODO Hexo also supports a lot of extension, I’d like to explain them later.
GitHub: deploy the blog
Normally, there are 3 methods of hosting a website: physical server, cloud server and some hosts providers. To be clear, I have a physical server with both public IPv4 and IPv6. But to some experience, I can’t place my trust on my server, especially when they are running other resource consuming services like LLM. Besides, I don’t want to invest infinite time in its maintenance. cloud server seems perfect when deploying with container (like docker) is available. However, there are 2 disadvantages: first is about laws in China. Any website which is self hosted should be filing by government, which is not ban but brings lots of inconvenience. Another one is the costs. It would costs more than $300 per year.
After a long research, there is no doubt that GitHub is of the best choices of hosting static website, especially blog. Luckily, Hexo official also thinks so. There is a very simple tutorial on how to deploy it on GitHub Pages.
After the installation and preview locally, use git init to initialize the whole blog folder with git. Then create a private or public repo called USERNAME.github.io and add the url to the local git origin. Add the configuration into .github/workflows/pages.yml , add all files into staged, commit all changes and push to GitHub. GitHub action should run in no time and you can find the blog on https://USERNAME.github.io
pages-build-deployment action always failed
Switch to GitHub Actions in Build and deployment setting.
Use custom domains
First go toGitHub Setting to add a custom domain and make it verified.
Then the core step is to add A AAA and CNAME records to the domain. The details is inofficial documents.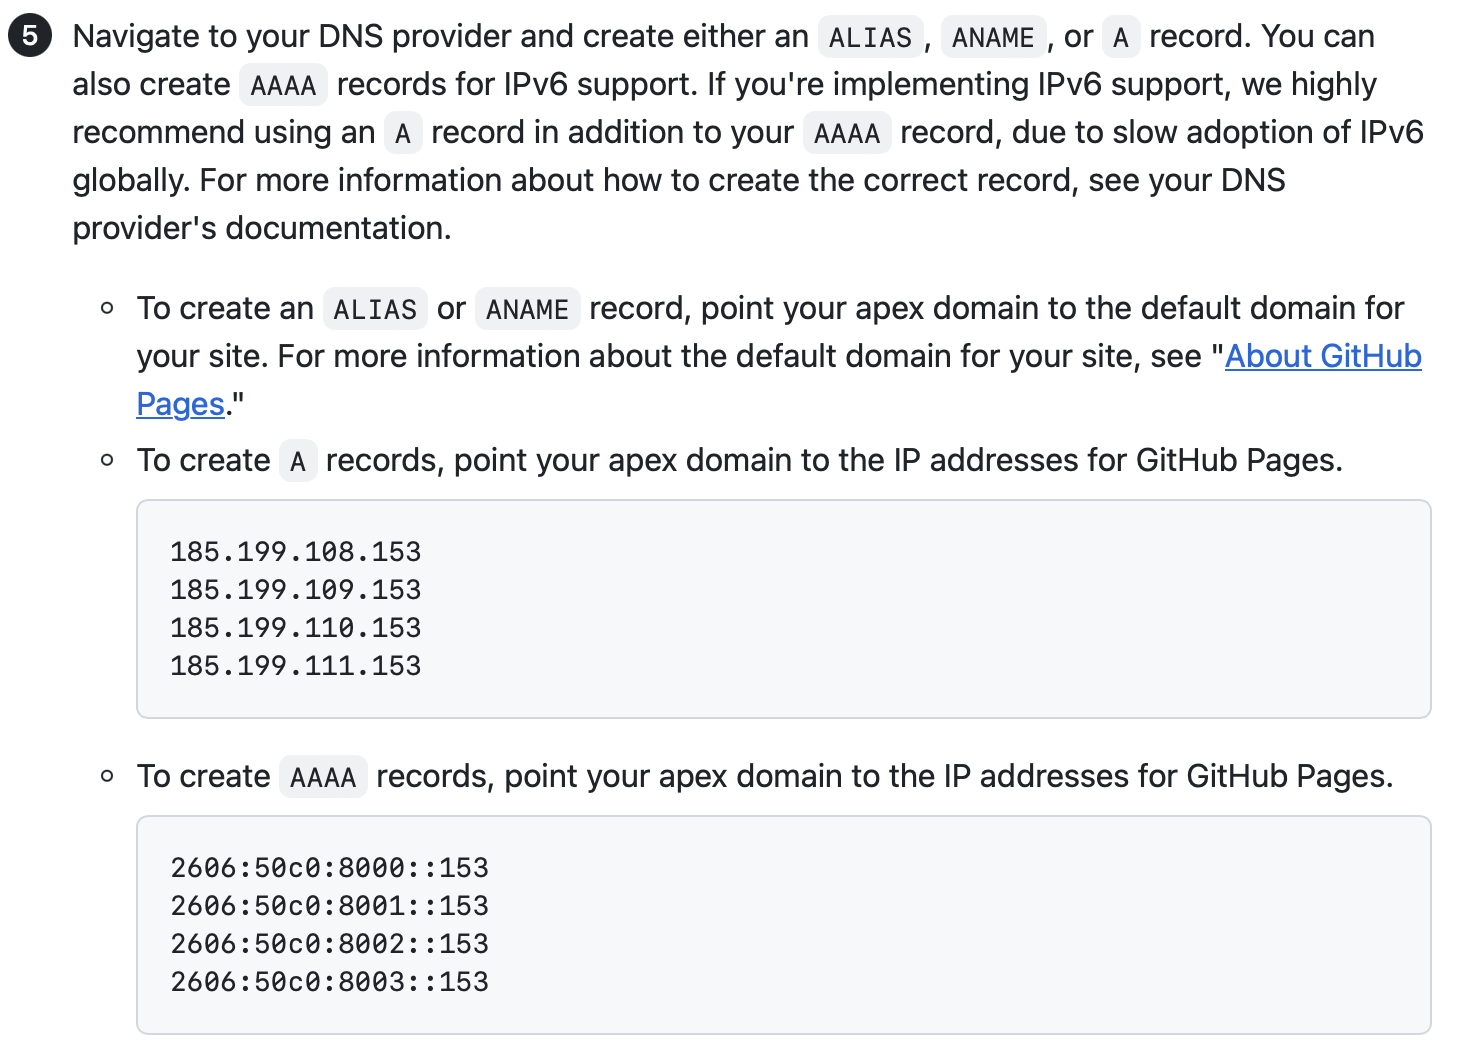
The total records looks like: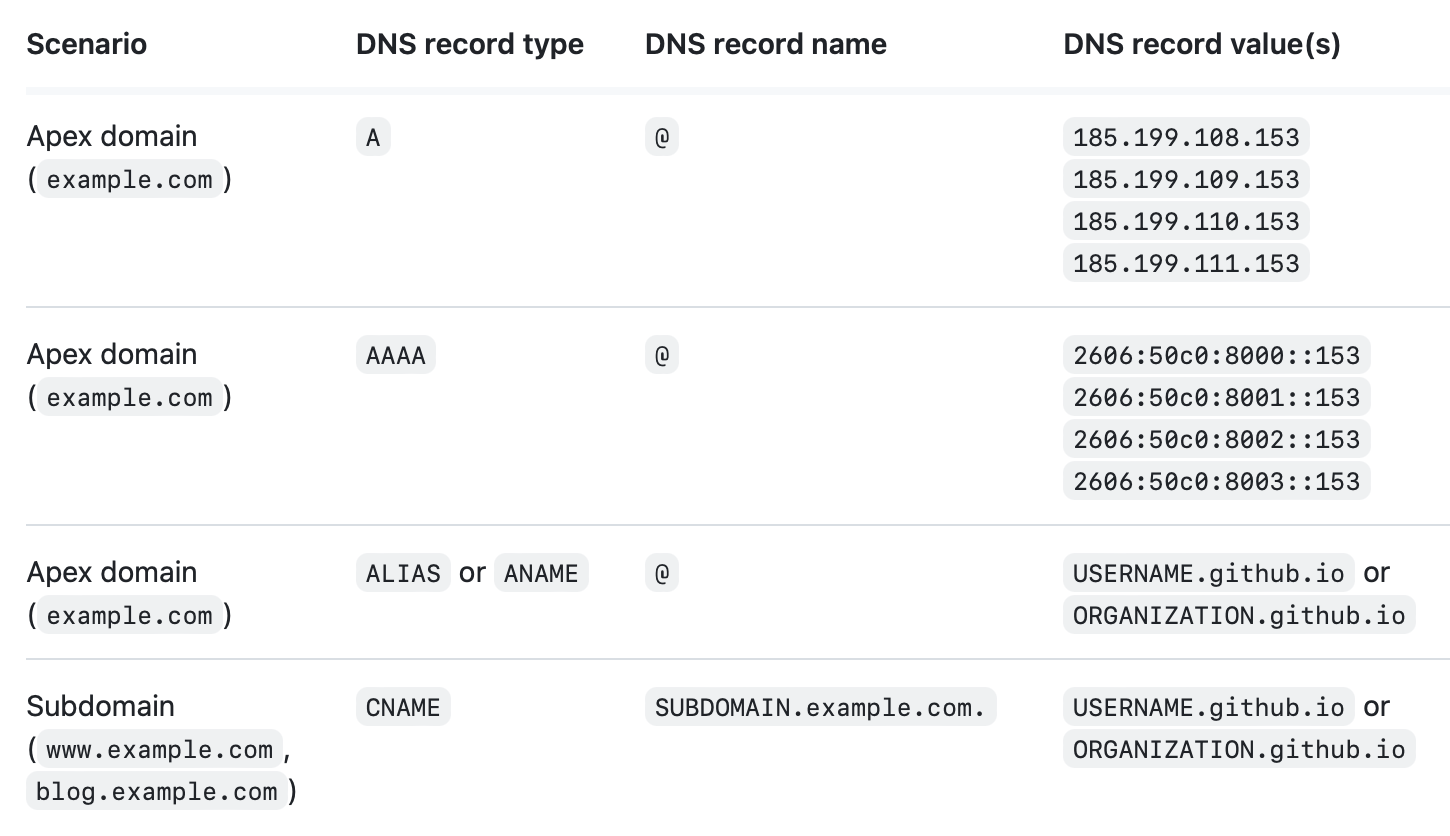
(From my experience, a single record for A and AAAA record is fine)
Last, add it to the Pages. A prefix is acceptable.
If CNAME or ALIAS for apex domain (whose record is USERNAME.github.io)works fine, the Enforce HTTPSshould be enabled after few minutes of generating SSL certification.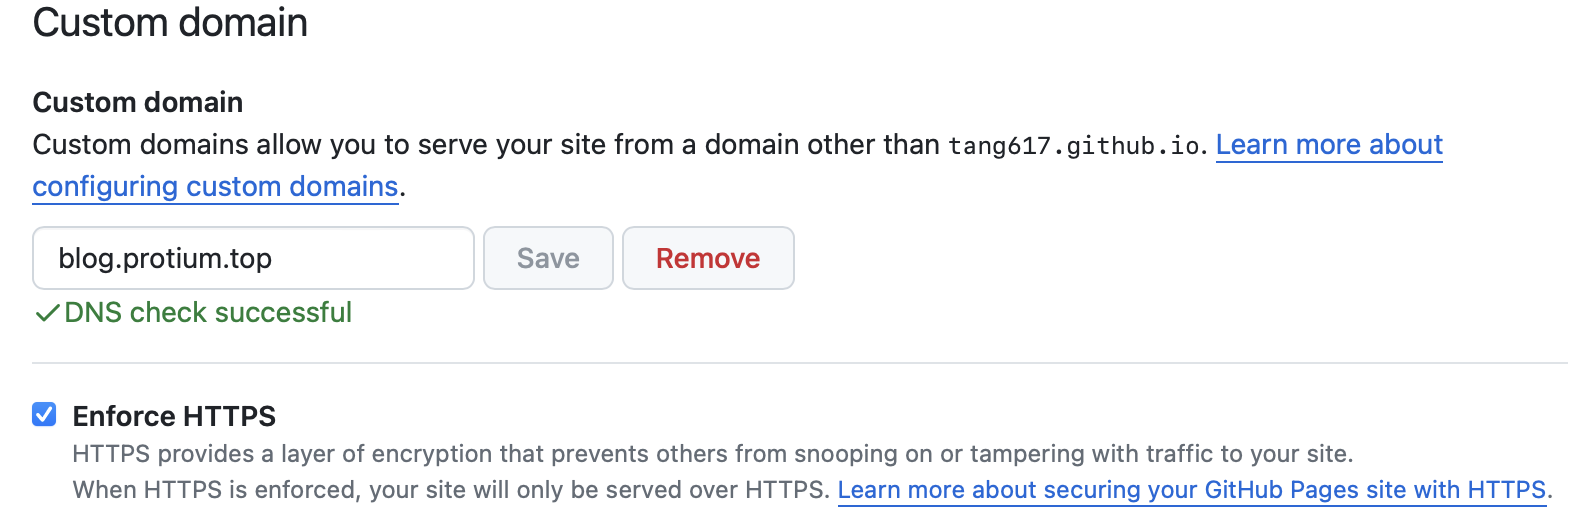
The blog is successfully deployed on GitHub Pages with SSL encrypted.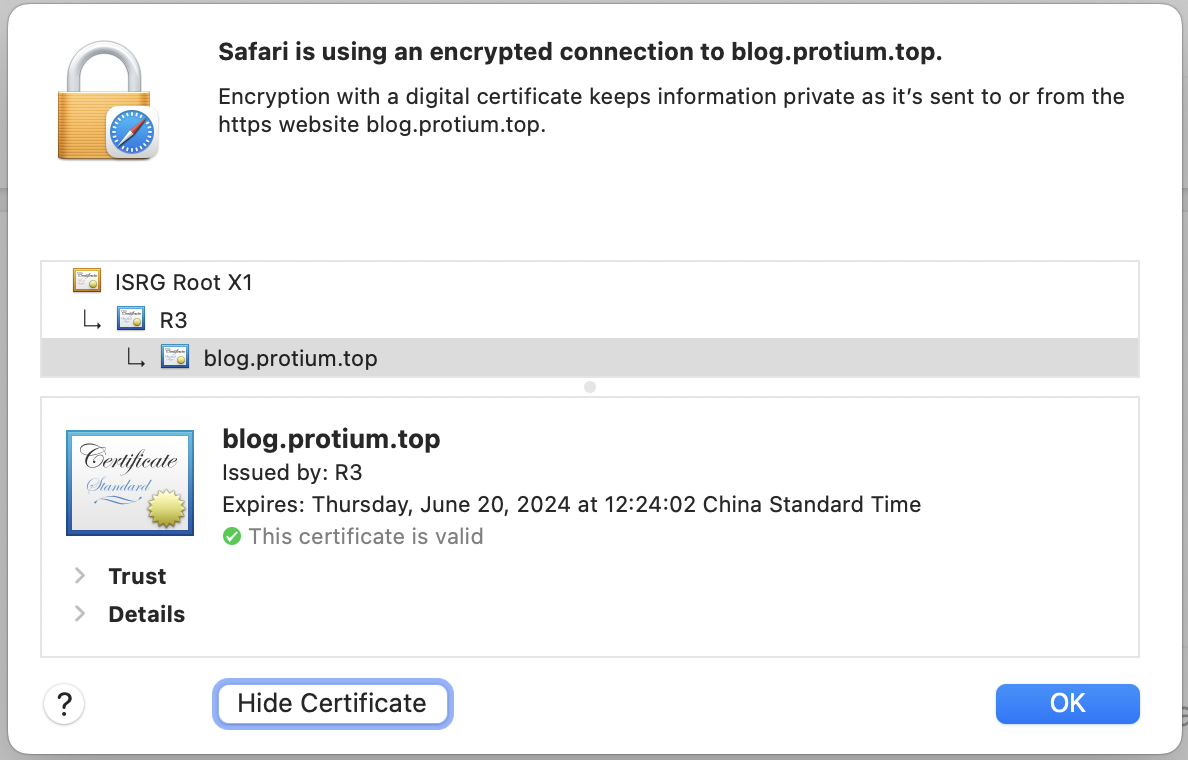
Obsidian: write the posts
Static website is not like something like WordPress, which includes a full database, allowing user edit the post directly from the web. Everything here should be done locally and the source code of website remains unchanged till next manual update.
The process of writing a new blog and update it to the website is in 2 steps: write markdown posts and push it to GitHub. Though there are many tools for markdown, and many for git push, the only combination of the 2 is Obsidian.
Visual Studio Code should work too, but it’s not a good markdown editor in any aspects.
My favorite Typora works perfectly for markdown, but it’s complicated to git commit and push from terminal.
Basically, Obsidian with the 2 extension is perfect for the whole workflow.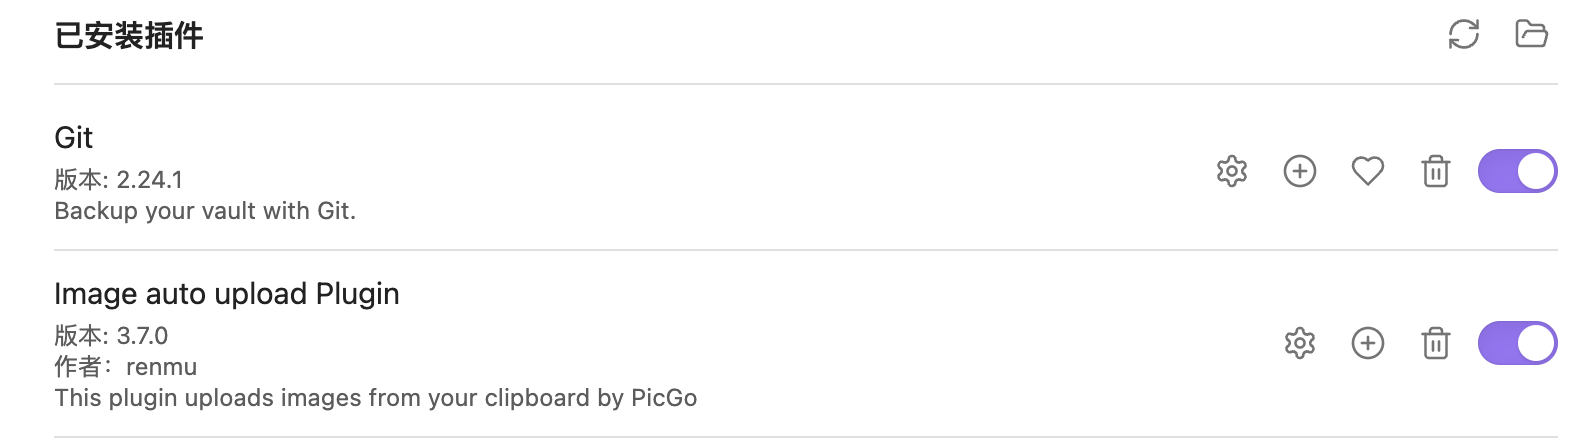
Image Bed
Put the image directly in the source folder is simple but less secure. Even an unexpected rename may cause serious data loss. So, I came to GitHub, again. Use Image auto upload plugin to trigger PicGo to upload the image pasted to GitHub repo.
Add https://cdn.jsdelivr.net/gh/USERNAME/images to set custom domaincolumn to use JsDeliver CDN service.